This guide will cover how to set up your FreePBX system to connect with both Telappliant (VoIPTalk) and OrbTalk SIP Trunks.
Prerequisites/Dependencies
- A FreePBX system set up with version 16. Previous version may not look the same as screenshots included in this guide. If you are looking to create a FreePBX system from scratch, please refer to the below guide on creating a virtual machine that hosts a FreePBX system. https://help.telappliant.com/freepbx/freepbx-server-setup-guide/
- Your Trunk ID, which you can find it by logging to your VoIPtalk panel via voiptalk.org. Or through your OrbTalk account at portal.orbtalk.co.uk
- Your Trunk's Password. This will be in the same place which your Trunk ID is located for each respective portal.
Section 1 - Setting up a trunk
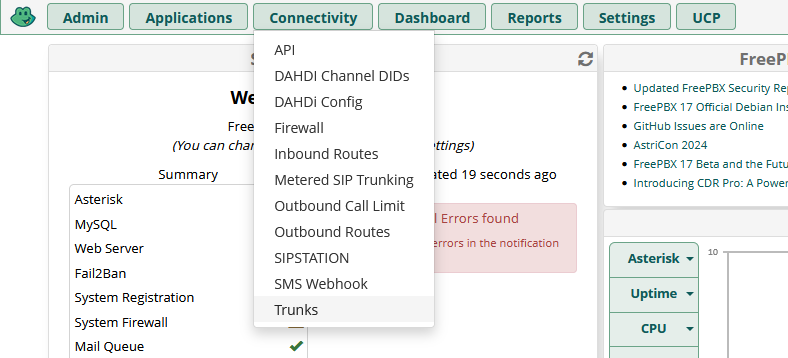
Click on connectivity and select 'Trunks'
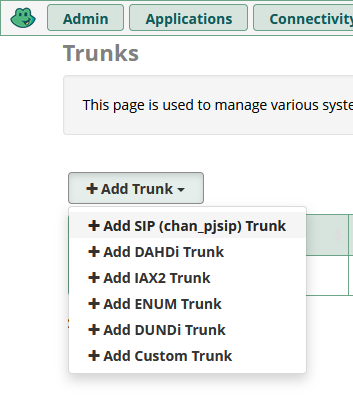
Click on Add Trunk and select Add SIP (chan_pjsip) Trunk
After selecting the trunk, you'll need to configure the “General” and “pjsip Settings” tabs.
Within the General tab:
- Trunk Name: This can be anything you like, but I recommend setting this to the Trunk ID number.
- Hide Caller ID: set this accordingly dependong on whether you want to be shown as “Anonymous” on calls outbound
- Outbound Caller ID: Set this to a number which you own, that you would like to present outbound to people you are calling.
- CID Options: For now, set this to Force Trunk CID. In some cases you may want to set this to “Allow Any CID” if you have Caller ID settings set on the extensions.
- Maximum Channels: set this to how many channels are available on your SIP trunk
- Asterisk Trunk Dial Options: leave as default
- Continue if Busy: leave this as No
- Disable Trunk: leave this as No
- Monitor Trunk Failures: leave this as No
Within the pjsip tab:
There are 2 sub tabs which need configuring.
Within the “General” tab under pjsip settings:
- Username: This is your Trunk ID
- Auth Username: Set this the same as your Username
- Secret: This is the password for your trunk which you obtained from either voiptalk.org or portal.orbtalk.co.uk
- Authentication: Set this to Outbound
- Registration: Set this to Send
- Language Code: Leave as Default
-
SIP Server: This is either going to be either of the 2 options below depending which platform you are using:
- sip.orbtalk.co.uk
- voiptalk.org
- SIP Server Port: This should be set to 5060 unless you require SIP traffic on a different port.
- Context: The default is usually “from-pstn” or “from-trunk”. If left blank it will default to “from-pstn”
- Transport: leave as 0.0.0.0-udp
Within the “Advanced” tab:
There are a lot of fields in this section, and the only 2 fields we need to change are:
- From Domain: Either sip.orbtalk.co.uk or voiptalk.org depending on your platform
- From User: Set this as the Trunk ID
IMPORTANT - IF YOU ARE A VOIPTALK USER, AND REQUIRE US TO NAT TRAFFIC FOR YOU, YOU MUST ALSO ENTER THE FOLLOWING ADDRESS IN THE OUTBOUND PROXY FIELD:
- sip:nat.voiptalk.org;lr
- If the above doesn't work try this instead: sip:nat.voiptalk.org\;lr
The most important part of the above is the “;lr” on the end. This is the loose routing setting, and this stops the Request URI from being altered. Make sure this is entered, otherwise calls will not work.
Adding the backslash ("\") as an alternative is for certain instances of FreePBX that ignore the semi colon. It ensures that the loose routing option is still processed.
The NAT domain above is only necessary in situations where you cannot NAT traffic from your network. If you already NAT traffic, you can leave the outbound proxy field blank.
Once completed, click the submit button at the bottom right. Then you will see an “Apply Config” button appears at the top right of the page. you do not need to click this button yet, as we have more changes to make before the config needs to be applied.

Section 2 - Creating Outbound Routes
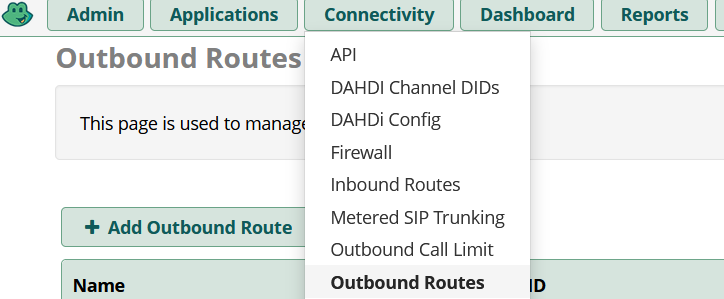
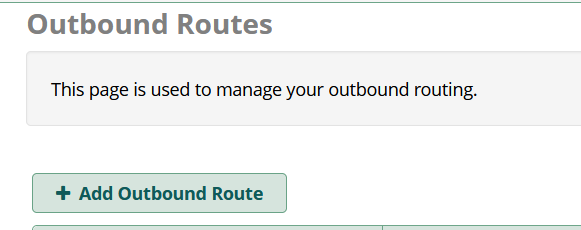
Hover over ‘Connectivity’ and then go to ‘Outbound Routes’, then click “Add Outbound Route”
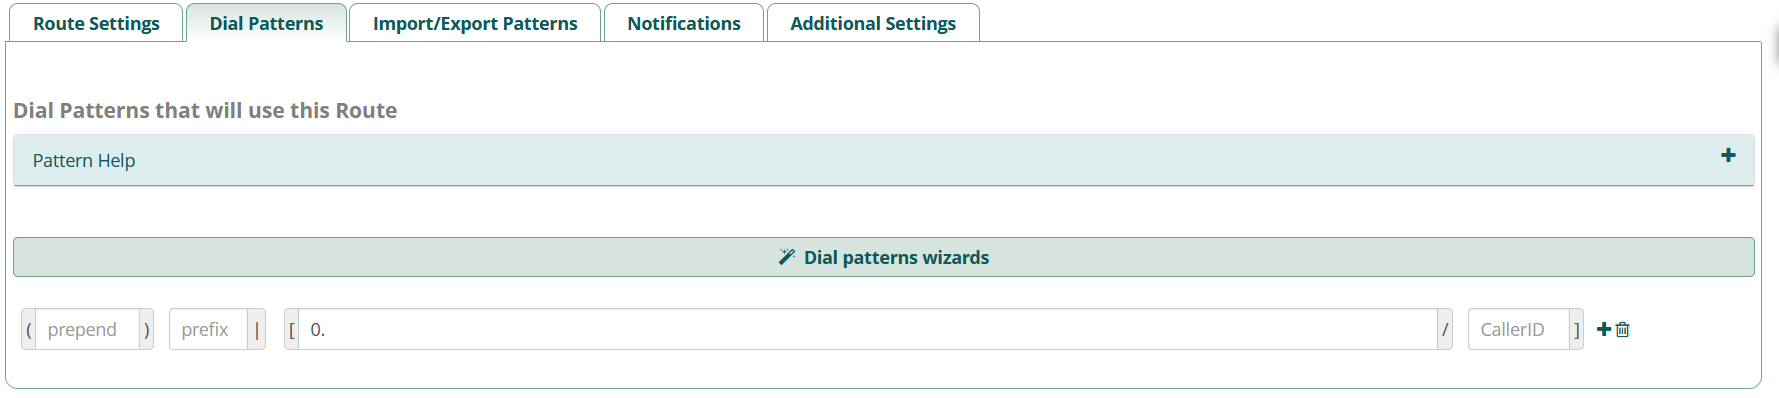
We need to configure both the “Route Settings” tab, and the “Dial Patterns” tab.
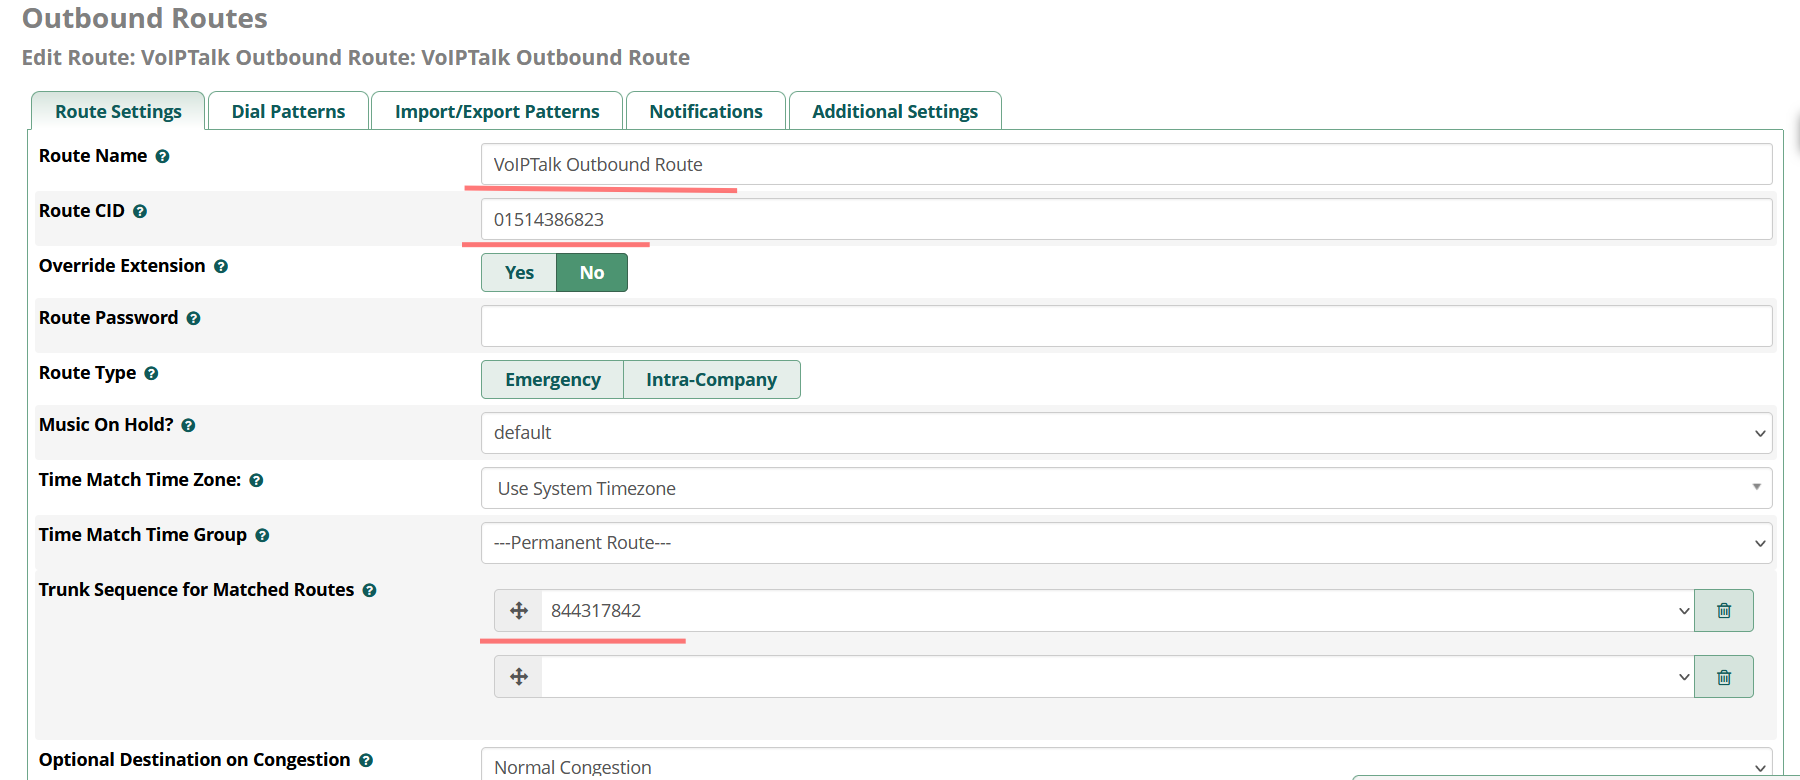
You will need to give your route a name, a number you wish to present when dialling outside of the system (it must be one that you own), and finally you must select the trunk you have just created in section one to go via this outbound route. An example configuration is below in the below image:
For the sake of getting outbound calls working, we are going to implement a catch-all dial pattern that will route anything that starts with a zero through here. To do this, enter “0.” as shown below.
Section 3 - Creating Inbound Routes
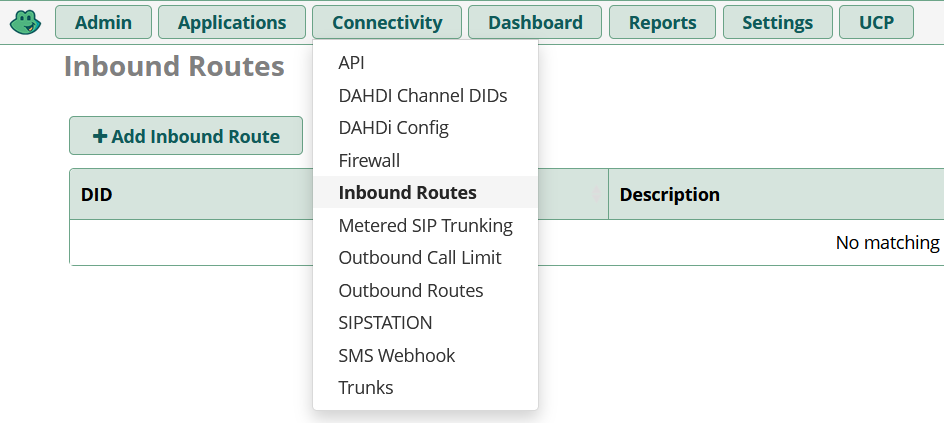
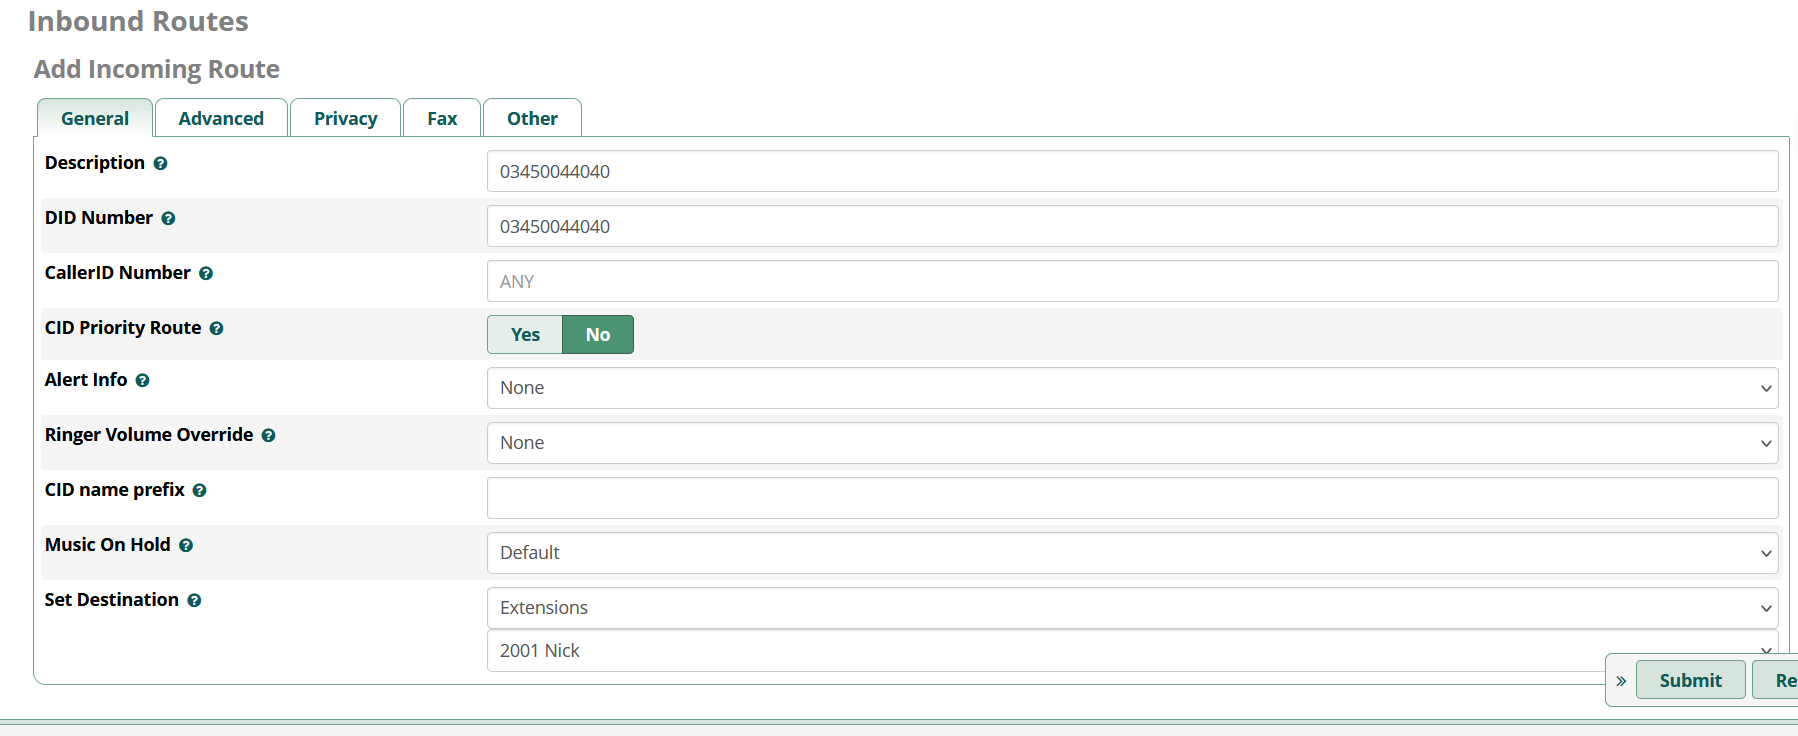
Hover over ‘Connectivity’ and then navigate to ‘Inbound Routes’, then click Add Inbound Route.
You'll need to enter a description of the route. The DID number is the number assigned to your account. Leave the CallerID Number as ANY so that the route will accept calls from any number into the system.
Finally, “Set Destination” at the bottom needs to be set to where you would like the call to terminate. In this example, I have chosen an Extension - 2001.
Assuming you haven't created an extension yet, no extensions will be displayed. In which case, you can set this to “Terminate call” and come back to this page later to change it to an extension.
Finally, click the submit button
Section 4 - Creating an Extension
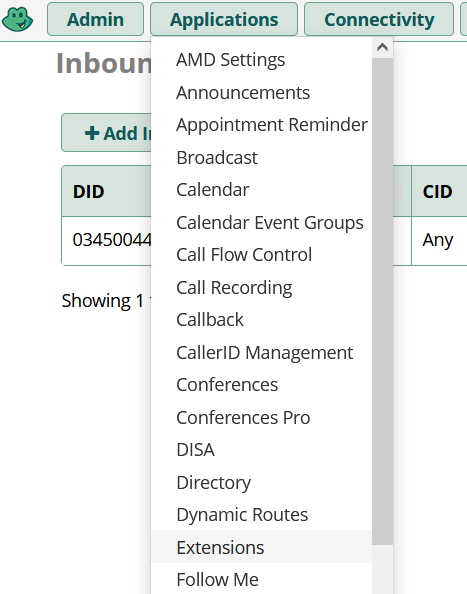
Start by hovering over Applications and then click Extensions
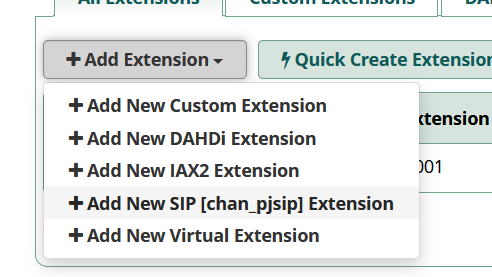
Then click Add Extension, and choose Add New SIP [chan_pjsip] Extension
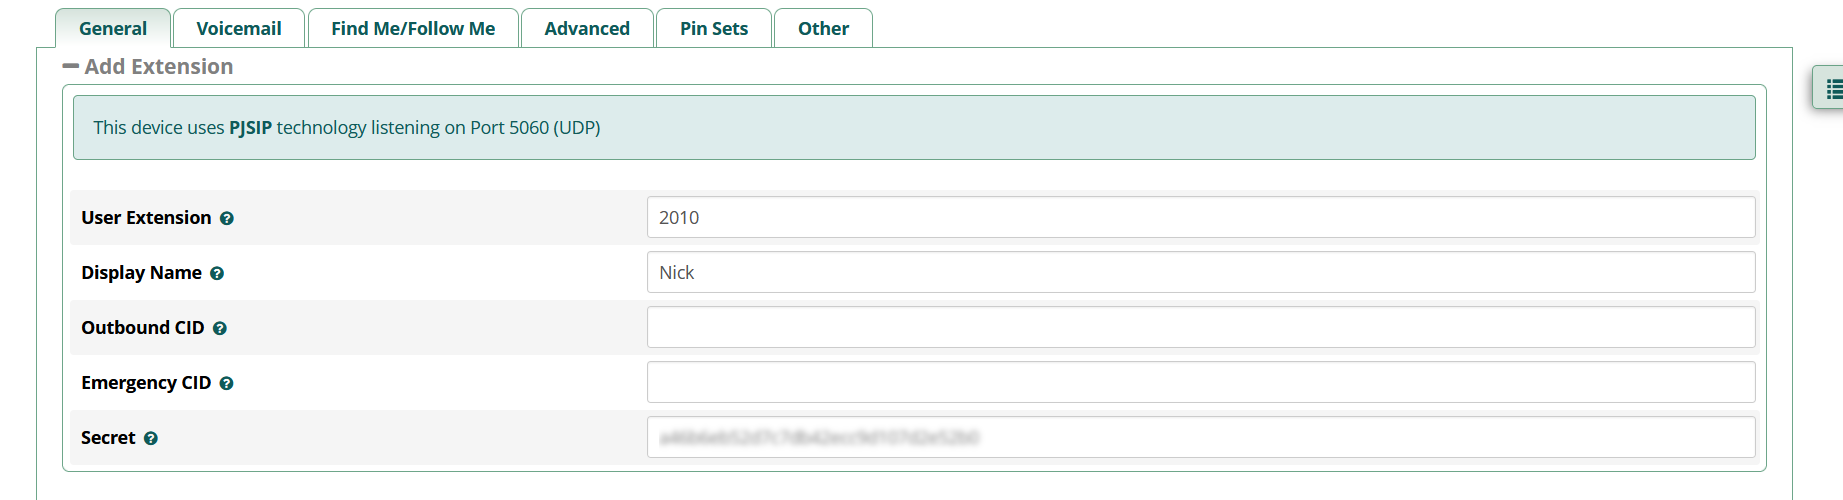
Enter an extension number (use common sense, don't let it start with a 1 or a 9).
Enter a display name, and make a note of the “Secret” which is the password you will need to enter into your SIP phone to connect to the system.
Finally, click the submit button at the bottom right.
Finally, click the Apply config button at the top right.
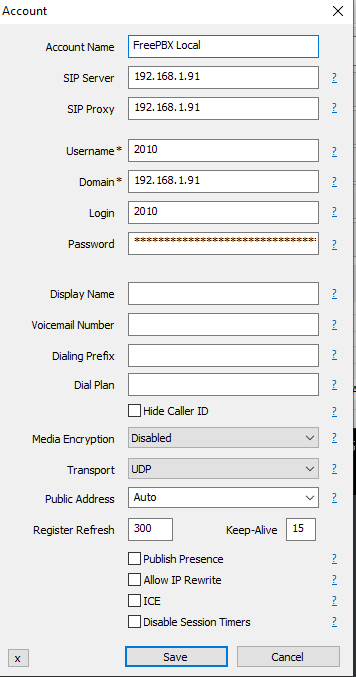
Section 5 - Registering your SIP phone to the PBX
In this example, I will be using a MicroSIP softphone. If you are using a different SIP client, or a physical SIP phone, the registration requirements may be worded slightly different.
In order to register to the FreePBX system. You will need to know the IP of the server that you created in the previous guide (here). In the example below, my server is using 192.168.1.91.
Enter the username as the extension number, and the password will be the secret.
All configuration made should now be reflected. At this point, check that the trunk is registered by testing an outbound call from the SIP phone that you have registered to your extension. Test an inbound call by calling the number which you created an inbound route for. Assuming that these were successful, you now have a functioning FreePBX system.

