The Inventory page allows you to manage your phone numbers and phone hardware.
Displaying the Inventory Page
All inventory tasks are performed from the Inventory page. To display this page, click the Inventory icon on the menu bar:

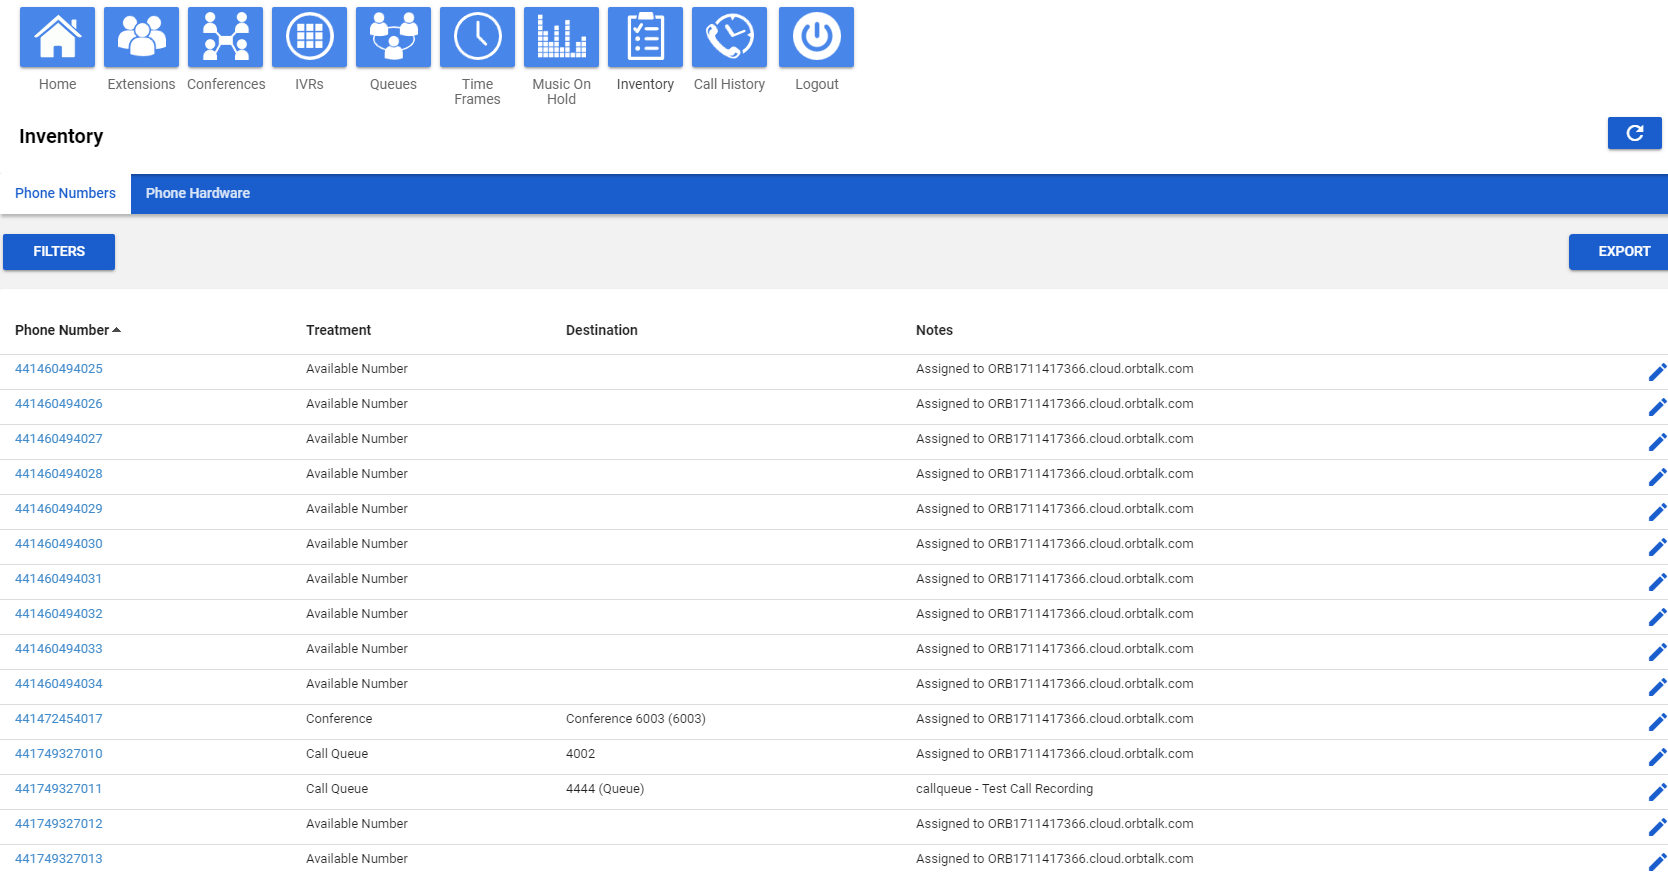
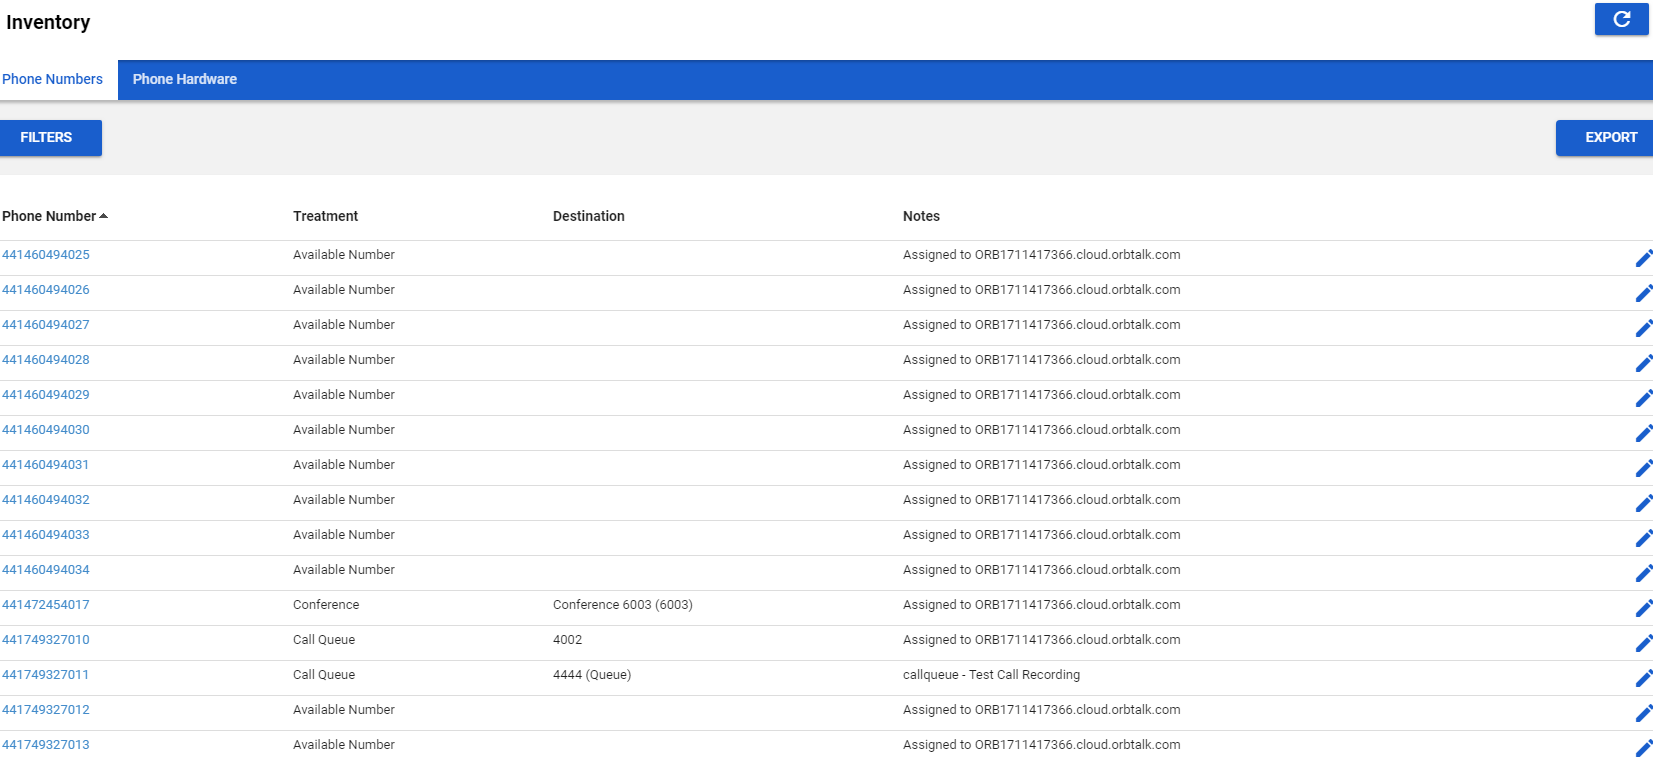
The following figure shows an example of the Inventory page. The page has two tabs:
- Phone Numbers allows you to filter, edit and export phone numbers.
- Phone Hardware allows you to filter, add, edit and export information about phone hardware.
The .png)
 button at the top-right side of the page refreshes the information on the page.
|
Where to go from here: From the Inventory, you can:
|
|---|
Managing Phone Numbers
The Phone Numbers tab allows you to filter, edit, and export phone numbers.
Filtering Phone Numbers
Using the Filters button, you can filter phone numbers and view only the numbers of interest to you.
- From the Phone Numbers tab, click the Filters button. The Phone Number Filters pop-up window appears.
- Complete the fields (see Table 10-1).
- Click Set Filters. The Phone Numbers tab shows only the phone numbers that match your criteria. If no phone numbers match your criteria, a message informs you that there are no matches to your filter.
Table 10-1. Phone Number Filter Settings
| Setting | Description |
|---|---|
| Phone number | Enter all or part of the phone numbers you want to view. |
| Treatment |
Select a treatment for the phone numbers you want to view. Choices are:
|
| Destination | Enter the name or extension of the phone destination. |
| Notes | Enter optional notes about this phone number. |
Editing Phone Numbers
To edit phone numbers:
- From the Phone Numbers tab, either:
- Click a phone number OR
- Hover over a phone number and then click the
.png)
 icon at the far right of the Phone Numbers tab.
Either step displays the Edit pop-up window.
- Complete the field (see Table 9-1).
- Click Save.
| Setting | Description |
|---|---|
| Treatment |
Select a treatment for the phone numbers you want to view. Choices are:
|
| Notes | Enter optional notes about this phone number. |
| Caller ID Prefix | Enter a prefix to the caller ID for this phone number. Range: up to 64 alphanumeric characters. |
Exporting Phone Numbers
You can export phone numbers in CSV format and then open the phone numbers in Microsoft Excel for further manipulation.
- From the Phone Numbers tab, click the Export button.
- When prompted, click Save.
Managing Phone Hardware
The Phone Hardware tab allows you to filter, add, edit and export information about the phone hardware in your system.
Filtering Phone Hardware
Using the Filter button, you can filter phone hardware and view only the phones of interest to you.
- From the Phone Hardware tab, click the Filters button. The Phone Hardware Filters pop-up window appears.
- Complete the fields (see Table 10-2).
- Click Set Filters. The Phone Hardware tab shows only the phones that match your criteria. If no phones match your criteria, a message informs you that there are no matches to your filter.
Table 10-2. Phone Filter Settings
| Setting | Description |
|---|---|
| MAC Address | Enter all or part of the MAC address of the phones you want to view. |
| Make and Model | Select the make and model of the phones you want to view. |
| Notes | Enter optional notes about this phone filter. |
Adding Phones
To add phones:
- From the Phone Hardware tab, click the Add Phone button. The Add Phone pop-up window appears, with the Basic tab displayed.
- Complete the fields in the Basic tab (see Table 10-3). The fields that appear are based on the make and model of the telephone selected.
- Click Advanced and then complete the fields in the tab (see Table 10-4). The fields that appear are based on the make and model of the telephone selected.
- Click Save.
Table 10-3. Basic Phone Settings
| Setting | Description |
|---|---|
| Model |
Adding a phone: enter the telephone's make and model. The remaining fields that appear in this window depend on the make and model selected. Editing a phone: read-only field that shows the phone model. |
| MAC Address |
Adding a phone: enter the telephone's MAC address. Editing a phone: read-only field that shows the phone's MAC address. |
| Line | If your phone has one or more lines, enter them in these fields. |
| Notes | Enter optional notes about this phone. |
Table 10-4. Advanced Phone Settings
| Setting | Description |
|---|---|
| Directory | If this setting is available for your make and model of phone, select a directory for this phone. |
| Preferred Server | If this setting is available for your make and model of phone, select the preferred server you want to associate with this phone. |
| Transport Method |
Select a transport method for the phone. Choices are:
|
Editing Phones
To edit phones:
- From the Phone Hardware tab, either
- Click a MAC address OR
- Hover over a phone and then click the
.png) icon at the far right of the Phone Hardware tab. Either step displays the Edit pop-up window.
icon at the far right of the Phone Hardware tab. Either step displays the Edit pop-up window.
- Complete the fields in the Basic and Advanced tabs (see Table 10-3 and Table 10-4).
- Click Save.
Exporting Phone Hardware Information
You can export phone hardware information in CSV format and then open the information in Microsoft Excel for further manipulation.
- From the Phone Hardware tab, click the Export button.
- When prompted, click Save.

