To learn how to set up Trunks, Outbound Routes, Inbound Routes, Extensions etc. Follow this guide: https://help.telappliant.com/freepbx-system-setup-guide-voiptalk-and-orbtalk/
This guide will cover how to set up a virtual machine that will hold an instance of FreePBX 16. This guide will not cover how to make the FreePBX server available via the public internet.
Prerequisites/Dependencies:
- An ISO of FreePBX which can be obtained from https://www.freepbx.org/
- You'll need to have virtualbox installed, which is the virtual machine software which we will be running FreePBX on. This can be obtained from https://www.virtualbox.org/wiki/Downloads
Section 1 - Virtual Machine creation and ISO mounting.
Once VirtualBox is installed on your machine, open up the application. You'll see the main VirtualBox dashboard. We'll start by clicking “New” to create a new virtual machine.

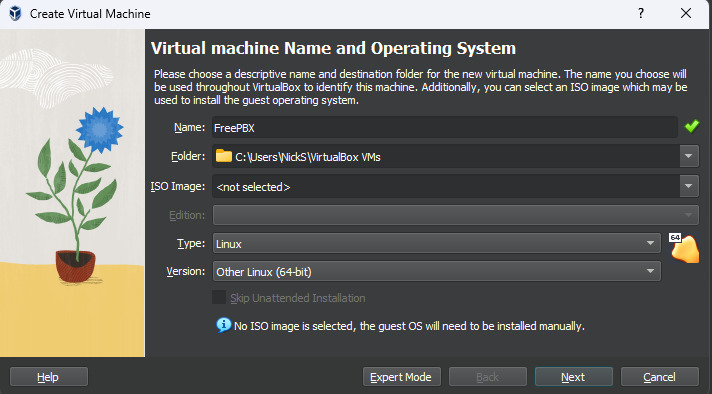
After clicking new, you should see a new window pop up asking for details.
- Name the VM “FreePBX”
- Leave the default folder unless you want the VM to be stored somewhere specific
- Leave the ISO Image blank, we will be mounting the ISO elsewhere.
- Set the Type as Linux
- Set the Version as Other Linux (64 Bit)
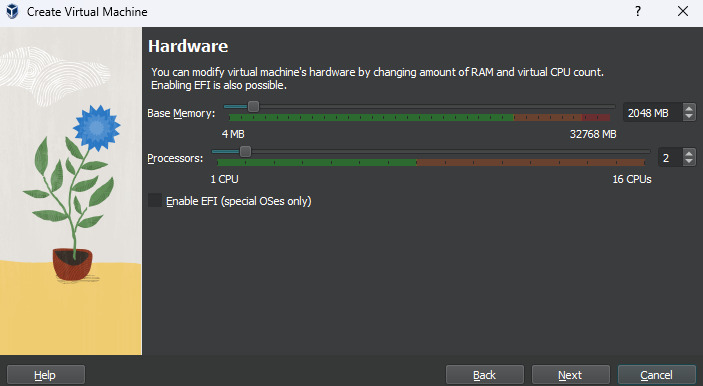
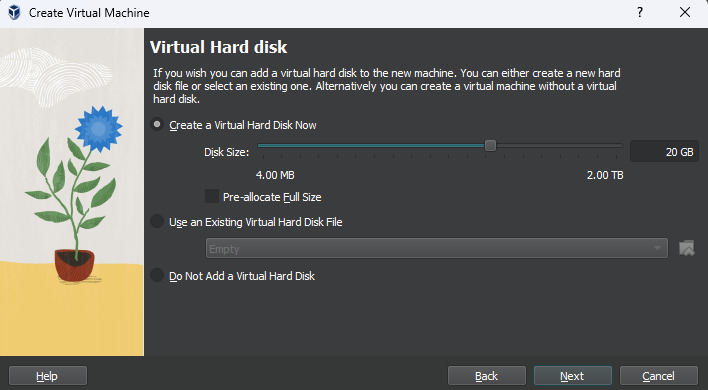
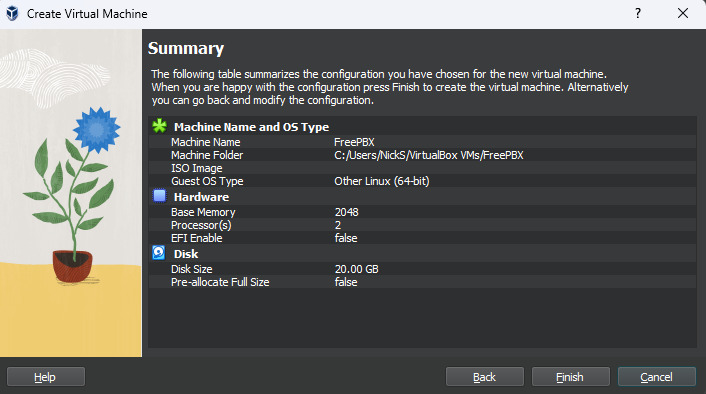
You'll then be asked to set up the virutal hardware for the machine, the spec in the images should be enough for the server to operate for testing. If the machine is going to be used for a live system, the virtual hardware will need to be significantly increased to ensure stability. Use common sense here.
You will then see your new VM listed on the left of the dashboard. And It will be showing as powered off, we want to leave it off for now.
We will now need to adjust some settings, so click on “Settings” accordingly"

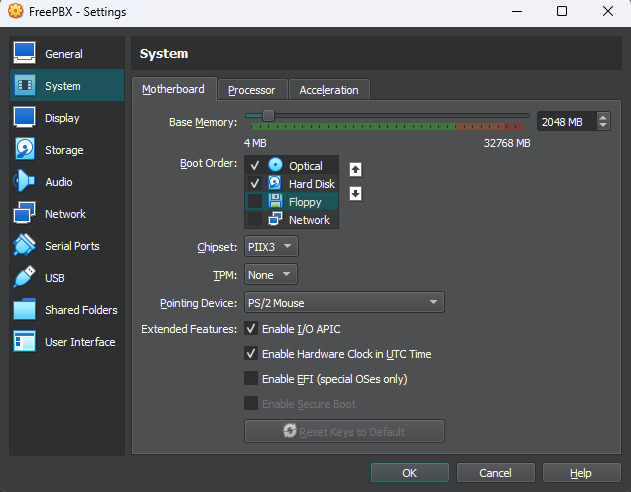
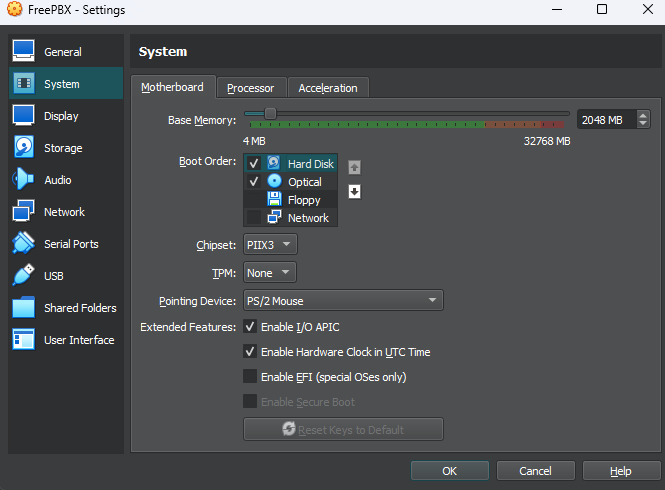
Click on the System tab, which will should you the Motherboard section by default. Within here, we want to adjust the Boot Order so that only “Optical” and “Hard Disk” are ticked. Make sure Optical is first, and Hard Disk is second.
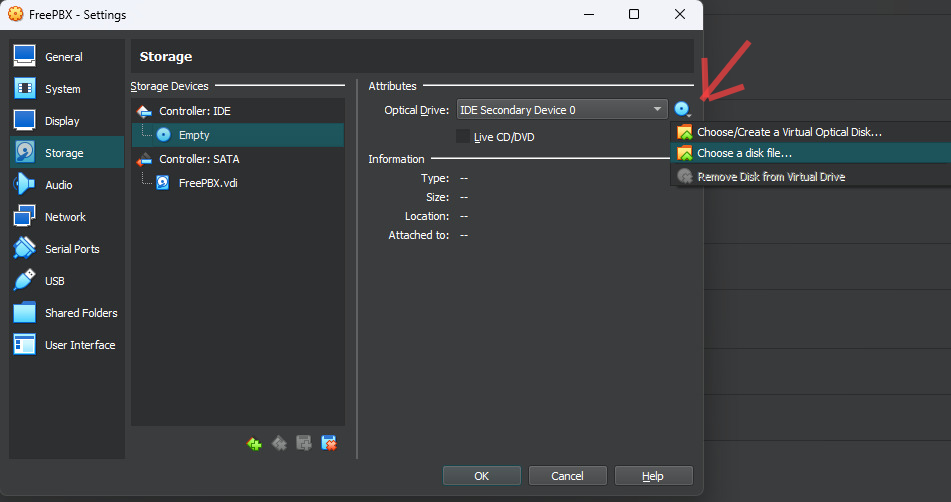
Next, click on Storage, and then click on the “Empty” device underneath "Controller: IDE"
On the right of this section, underneath “Attributes”, click on the blue disc, which will then give you 3 options, and we want to click on “Choose a disk file”.
An explorer window will popup, at which point you can now select the FreePBX ISO file.
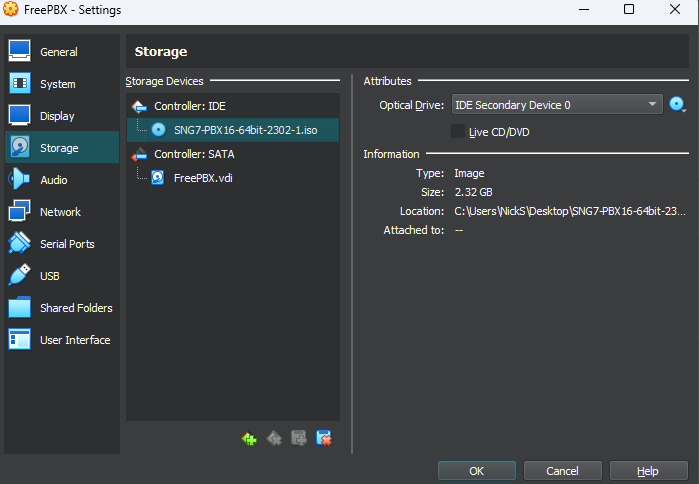
The empty storage device should now show the ISO file instead.
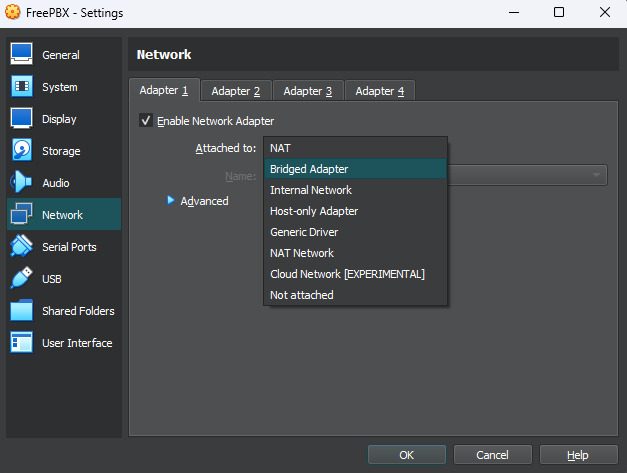
Next click on the Network tab, and on Adapter 1, we want to change the “Attached to” option to “Bridged Adapter”. This will ensure that the server can be accessed locally within your network. Finally, click OK at the bottom to save all changes.
Section 2 - Installing FreePBX
The virtual machine can now be started. But we want to make sure that we start it in “Headless” mode. This gives us the option to run the virtual machine in the background rather than having to keep the VM window open all the time.
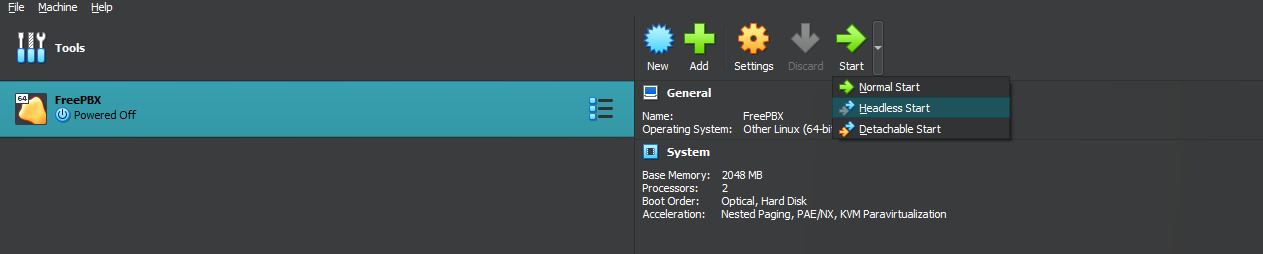
Once the VM has powered on, the Start button will change to a “Show” button. Click on this to open the virtual machine window.

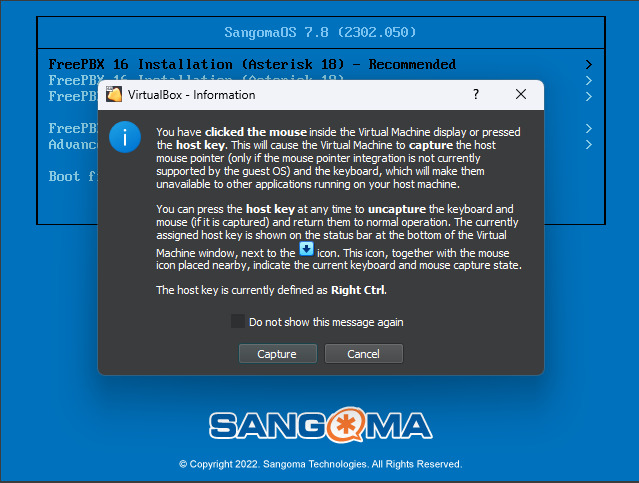
Once the VM window is open, you'll need to click onto the screen for any mouse & keyboard inputs to be read by the application. An information window will pop up advising you of some information. The key information to understand here is:
- Once you click into the VM, your mouse & keyboard are now locked in to that application
- To unlock your mouse & keyboard, the default key is Right CTRL. This can be changed if required.
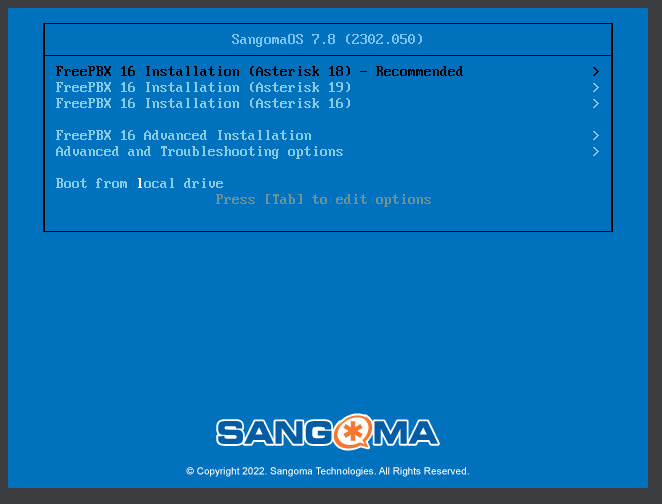
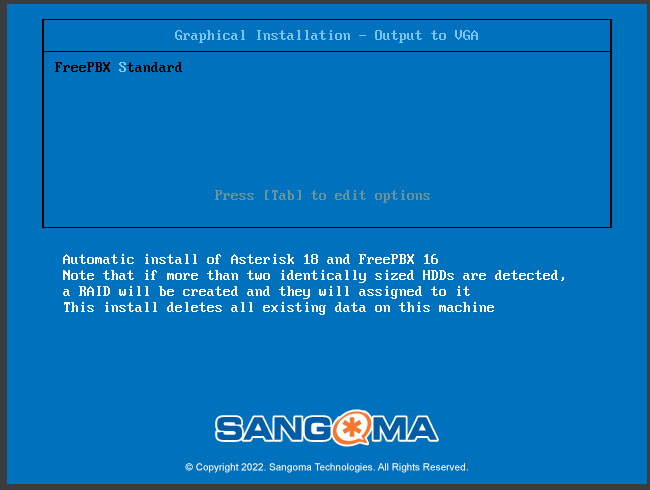
Once you have clicked onto the VM, you now need to use your keyboard to install FreePBX, select the top option (FreePBX 16 (Asterisk18)) by hitting the enter key.
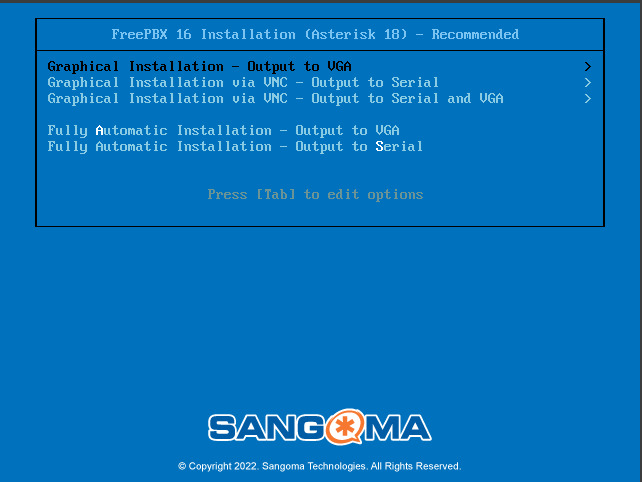
Select the top option again (Graphical Installation - Output to VGA) by hitting enter.
Hit enter again on FreePBX Standard. The Linux machine will begin ouputting a lot of install information. This will take a minute or so to complete.
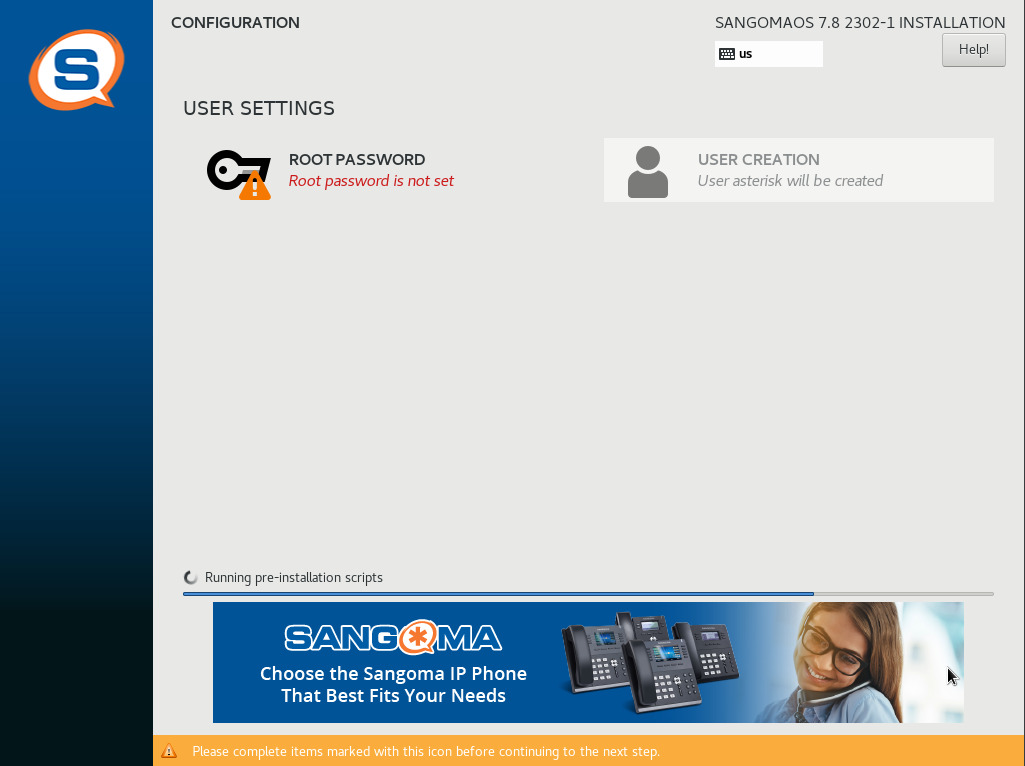
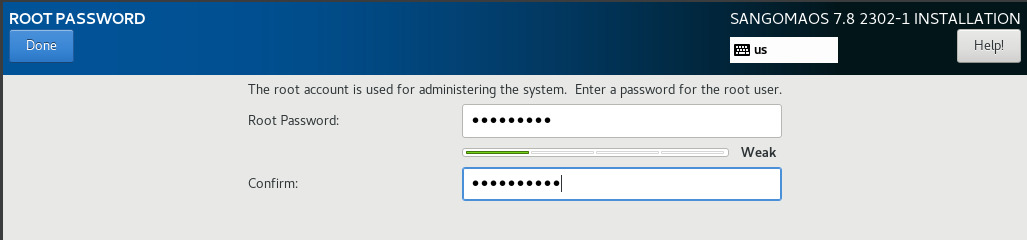
You will then be presented with an install screen. The install progress bar is at the bottom. In the meantime, make sure you set up your Root password (you can use your mouse at this point, so click on Root Password). Enter your password, make a note of it, and then click the “Done” button at the top right.
IMPORTANT - Once the install is completed, do not click the reboot button. Instead, hit Right CRTL to unlock your mouse and keyboard, and close the whole VM window, and choose the option “Power off the machine”.
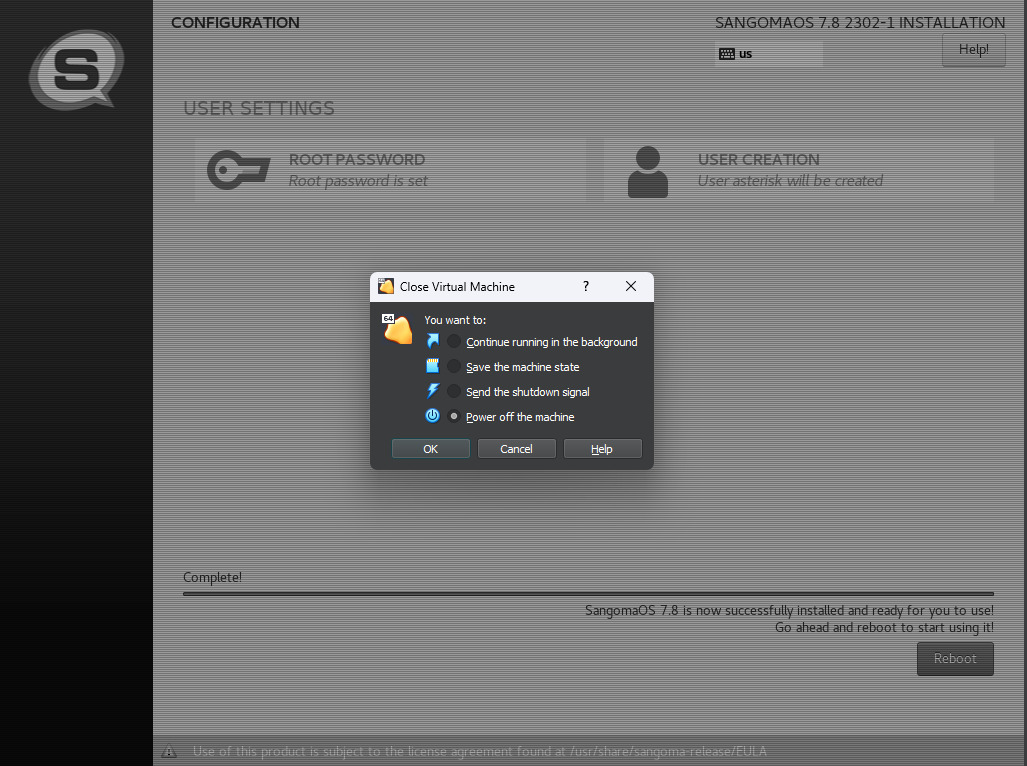
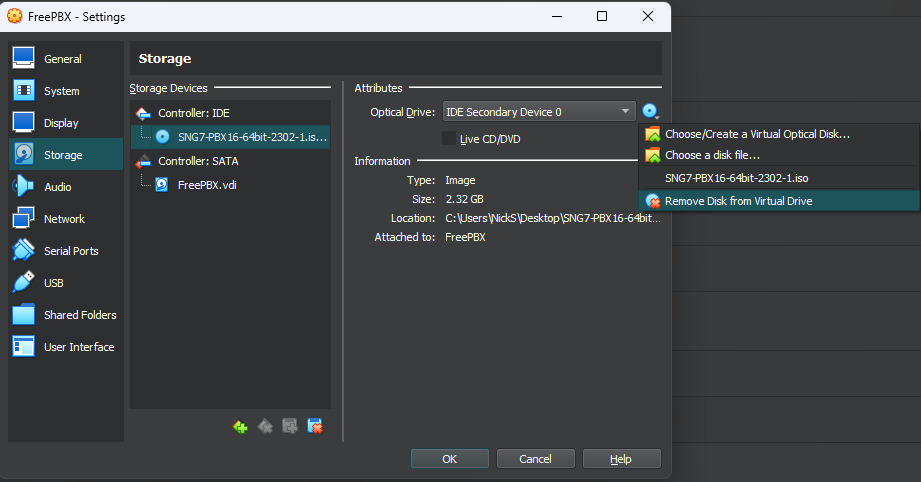
The reason why we have powered off the machine is to change the Boot Order again, if we press the reboot button, the machine will continue booting from the ISO disc that we've mounted. This is no longer required, and instead we want to boot from the Hard Disk which contains our FreePBX operating system. Go back into settings > storage > click the ISO under Controller: IDE, and then click “Remove Disk from virtual drive”
Then go into System, and adjust the boot order so that Hard disk is above Optical. You can change the order but using the arrow keys next to the list. Then save chages by clicking OK
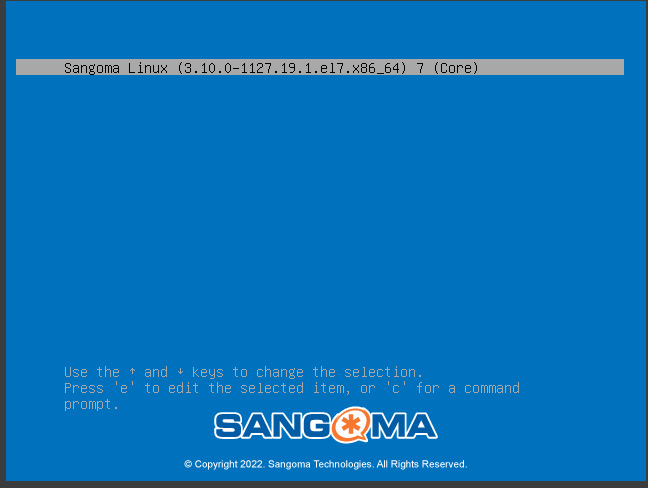
Now you can start the VM in headless mode once more.

Once booted, click into the VM again, and press enter when you see the “Sangoma Linux” option as displayed below.
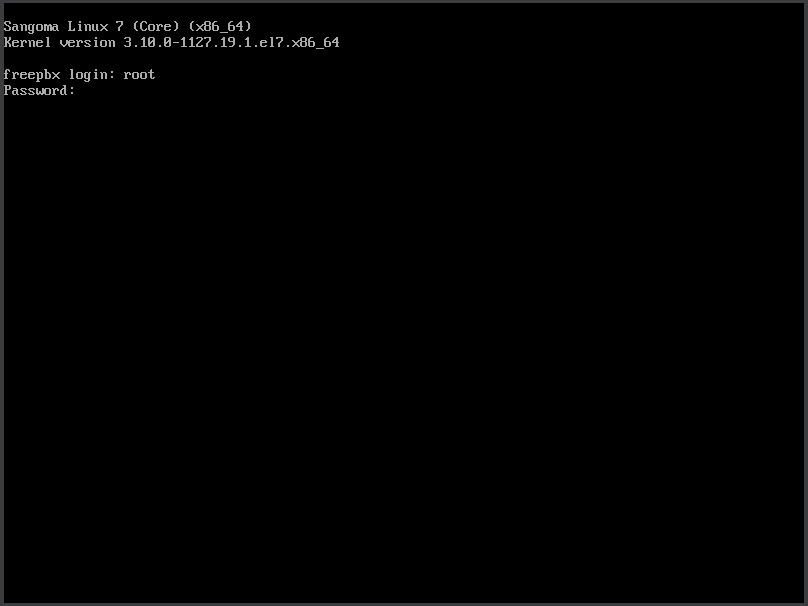
Eventually you will be presented with a terminal, which asks for the freePBX login.
The username is root, and the password is whatever you set it to while you were waiting for FreePBX to install.
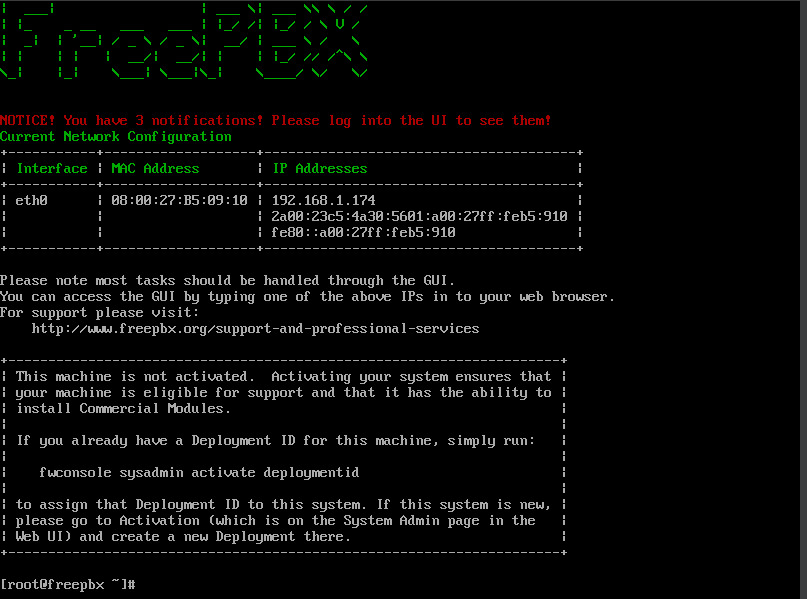
You will now see info about FreePBX. What is important to us here is the local IP Address. This is the IP we will need to access the Web GUI for FreePBX. Go ahead and enter this IP into your desired web browser.
It is likely that your IP address will be different to the one in the below image, so use common sense here.
As for the virtual machine, it needs to stay powered on, but if you started it in headless mode, you have the option to close the VM window and leave the VM running in the background - the choice is yours.
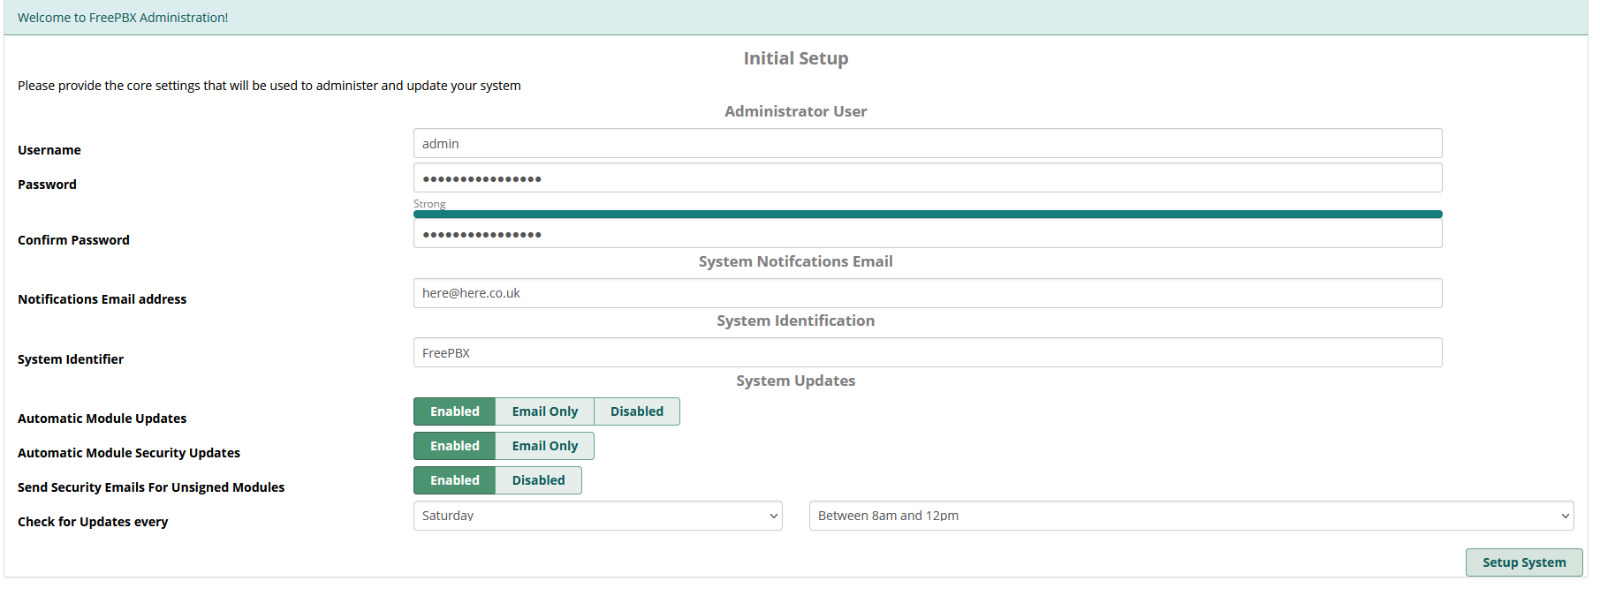
Once you have entered the local IP into your desried web brower, you will be asked to complete an initial setup. Make sure to note down the administrator username and password which you enter, this will be needed after finishing the setup.
Finally, click on “FreePBX Administration", the system will ask you for the admin login which you just made.
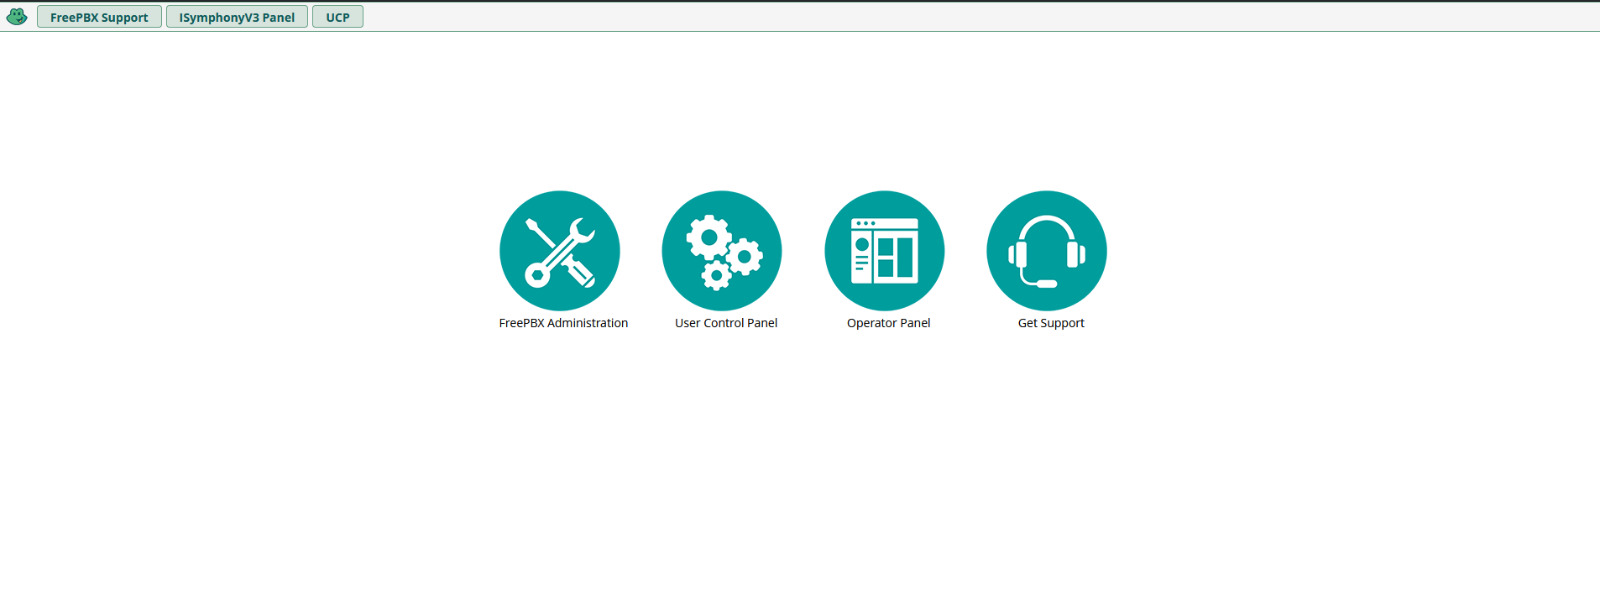
You should now see the Admin portal for FreePBX!
If for any reason the GUI tells you that the credentials are incorrect, and you know that you've entered them correctly. There is a solution:
- On the screen above (which shows the 4 options), enter CTRL + A to select all
- You should then see a bunch of numbers and letters highlighted in the middle of the screen. This is your session ID. copy and paste this session ID into a notepad.
- Go back to your virtual machine window, where the terminal is.
- enter the following command:
- fwconsole unlock “Session ID Here”
- Use common sense here and don't include the quote marks…
- The terminal should now output that the session has been unlocked.
- Go back to the Web GUI and refresh. This should now allow you into the FreePBX Administration page.
To learn how to set up Trunks, Outbound Routes, Inbound Routes, Extensions etc. Follow this guide: https://telappliant.helpjuice.com/admin/questions/2469314-freepbx-system-setup-guide-voiptalk-and-orbtalk

