- Connect the base station power using supplied power adapter and the network cable. Please wait for it to boot up.
- Insert the battery into the handset and press Power Key "
 " on the handset to power it up.
 - Press Paging Key "
 " on the base station. All the handset that registered to this base station will ring simultaneously and the screen will display the IP address of the base station..
 - Enter the IP address found in Step 3 into a web browser on a local PC.
- Login using your set credentials or using default credentials:
Username: admin
Password: admin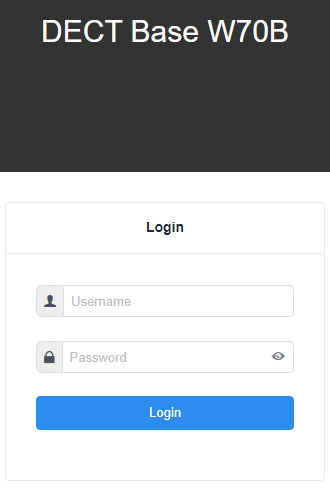
-
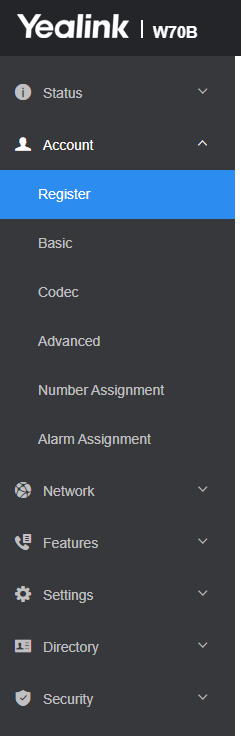
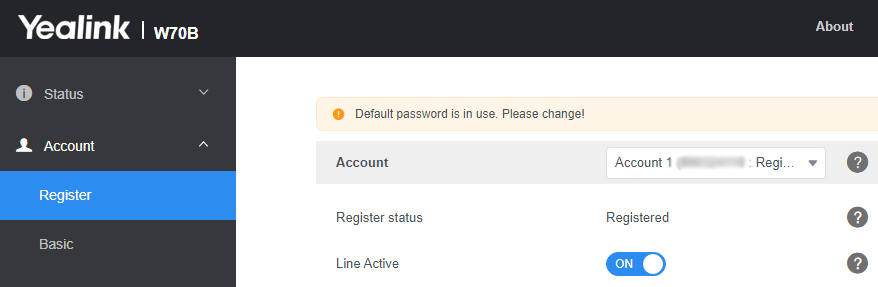
Select 'Account' from the sections on the left then 'Register'
-
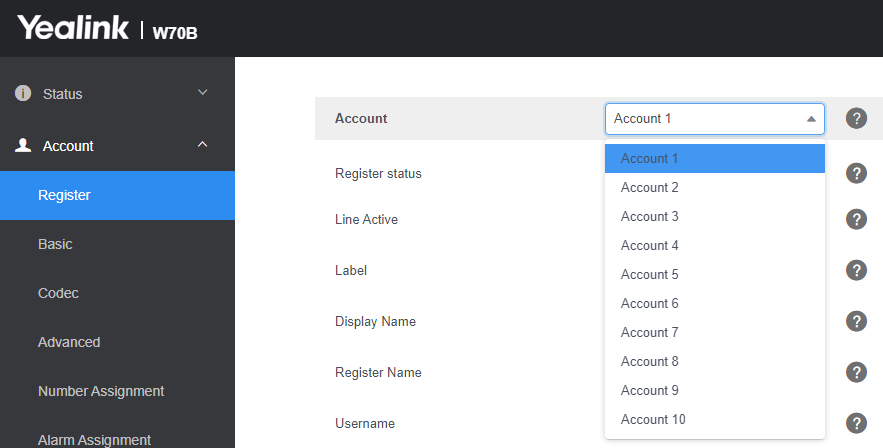
Select the account you wish to configure. For this example it is 'Account 1' from the drop down list.
-
The following settings should be made by entering your VoIPtalk ID and password details:
Line Active: ON
Label: <<VoIPtalk ID>>
Display Name: <<VoIPtalk ID>>
Register Name: <<VoIPtalk ID>>
Username: <<VoIPtalk ID>>
Password: <<VoIPtalk password>>
Server Host: voiptalk.org
Port: 5065
Enable Outbound Proxy Server: ON
Outbound Proxy Server 1: nat.voiptalk.org
Port: 5065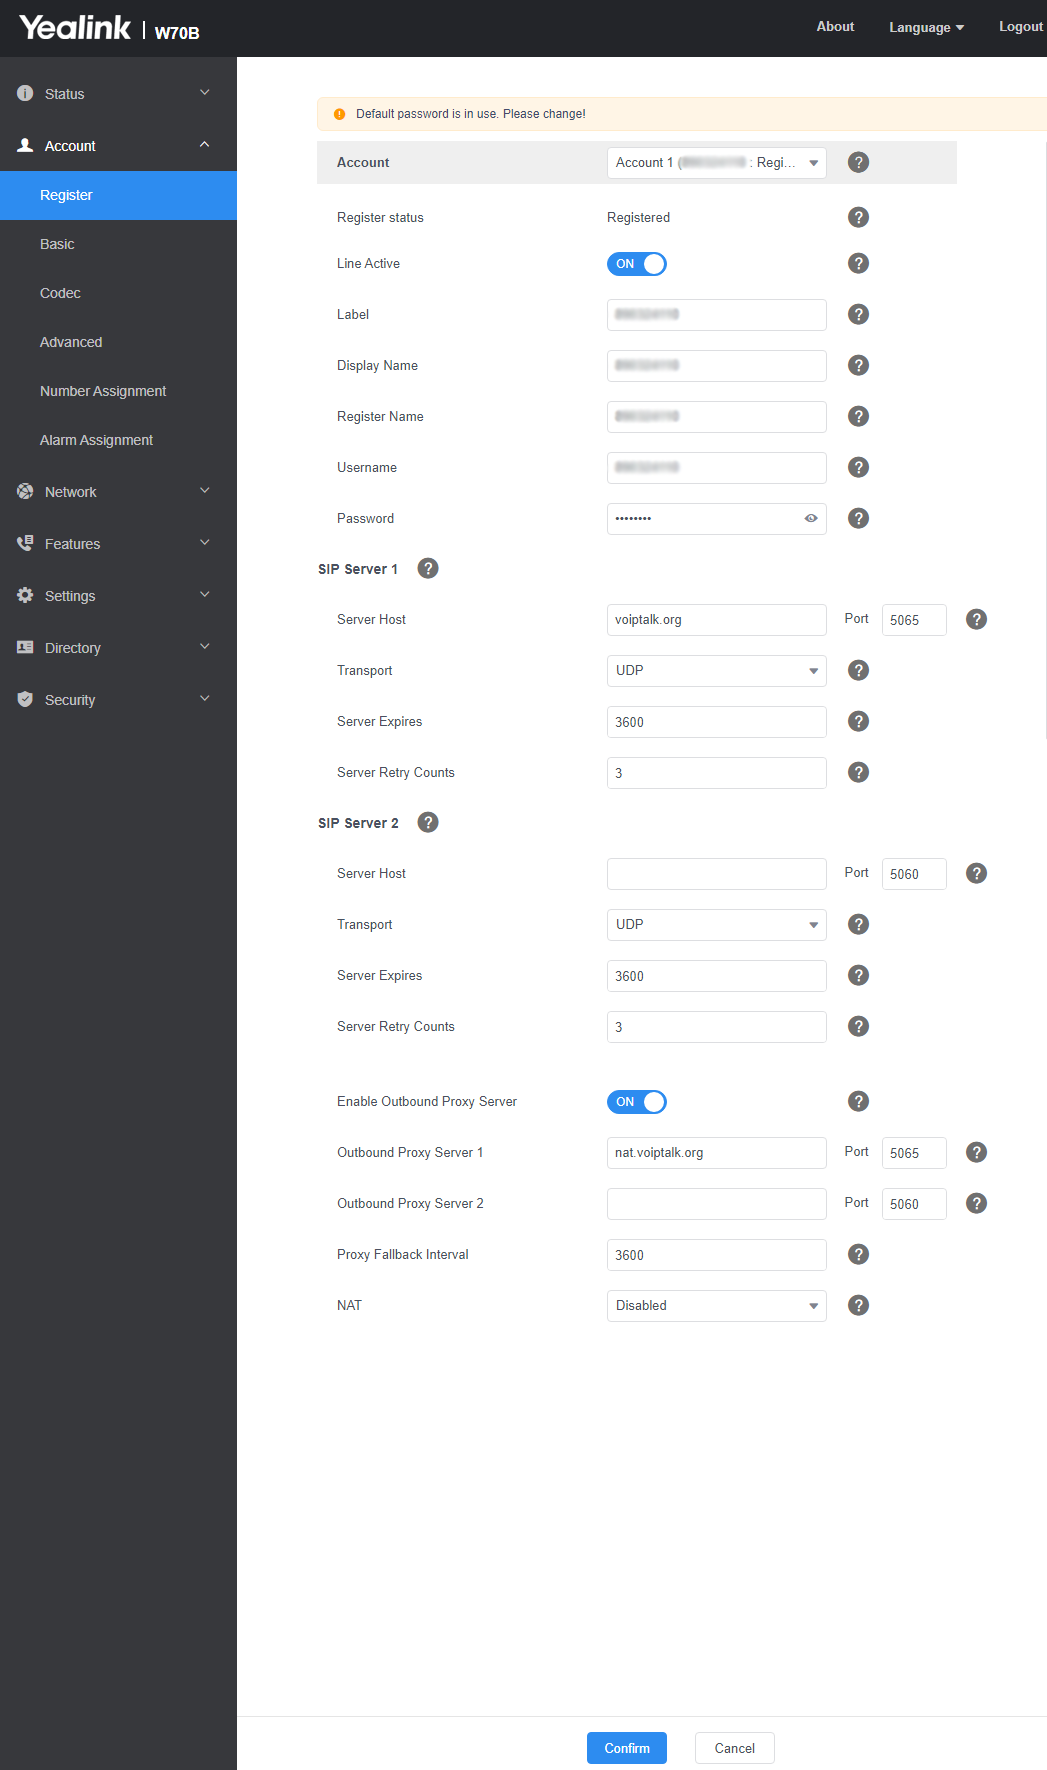
-
Click 'Confirm' to save settings
- Under the configured account, 'Registered' should be shown.
- Congratulations! Your phone should now be configured.
Adding a W73H
Adding a Yealink W73H handset to an existing W73P (which consists of a W70B base station and one or more W73H handsets) or a standalone W70B base station is a straightforward process. Here's how you typically do it:
Key Steps:
Put the Base Station into Registration Mode:
- Locate the paging/registration button on your W70B base station. It's usually a button with an icon that looks like a Wi-Fi signal or a handset.
-
Press and holdthis button for about 3-5 seconds until the registration LED light on the base station starts flashing (usually green).This indicates the base station is now discoverable and ready to pair with a new handset.
- Note: The base station will typically stay in registration mode for a limited time (e.g., 90 seconds). If you take too long, you might need to repeat this step.
Register the W73H Handset:
- On your new W73H handset, if it's not already registered, it will likely display 'Unregistered!' or a similar message.
- You should see a 'Reg' or 'Register' softkey (a button below the screen whose function is displayed on the screen next to it). Press this softkey.
- Alternatively, you can usually go into the handset's menu:
- Press the OK key to enter the main menu.
- Navigate to Settings (often an icon that looks like a gear or wrench).
- Select Registration.
- Choose Register Handset.
- The handset will start searching for a base station in registration mode.
- It should find your W70B base station. It might display 'Base 1' or the MAC address of the base. Select the correct base station if multiple are shown (though usually, it's just one).
- You will be prompted to enter a PIN. The default PIN for Yealink base stations is usually 0000. Enter the PIN and press 'Done' or 'OK'.
- The handset will then attempt to subscribe to the base station.
Confirmation:
- Once successful, the handset screen will typically display 'Handset Subscribed,' 'Success,' or show the handset number assigned to it (e.g., 'Handset 2' if it's the second handset registered).
- The registration LED on the base station should stop flashing and may turn solid green.
Important Considerations:
- Range: Ensure the handset is within the DECT range of the base station during the registration process.
- Maximum Handsets: The Yealink W70B base station supports a specific maximum number of handsets (typically up to 10). If you've reached this limit, you won't be able to add more without de-registering an existing one.
- Firmware: For optimal performance and compatibility, ensure both your base station and handset have up-to-date firmware. This usually happens automatically when connected to the internet, but manual updates can sometimes be necessary.
-
Troubleshooting:
- If registration fails, double-check that the base station is still in registration mode (LED flashing).
- Verify you are entering the correct PIN (if it was changed from the default, you'd need that new PIN).
- Move the handset closer to the base station.
- Try rebooting both the base station and the handset.
Always refer to the official Yealink user manuals for your specific models if you encounter any difficulties, as slight variations in menu options or procedures can occur.

