Queues are a 'waiting line' commonly used for support and sales groups. Callers receive music on hold while waiting for the next available agent.
Displaying the Queues Page
All queue tasks are performed from the Queues page. To display this page, click the Queues icon on the menu bar:
.png)
The following figure shows an example of the Queues page. The .png)
 button at the top-right side of the page refreshes the information on the page.

|
Where to go from here: From the Queues page, you can:
|
|---|
Adding Queues
To add queues:
- From the Queues page, click the Add Queue button. The Add a Queue pop-up window appears, with the Basic tab displayed.
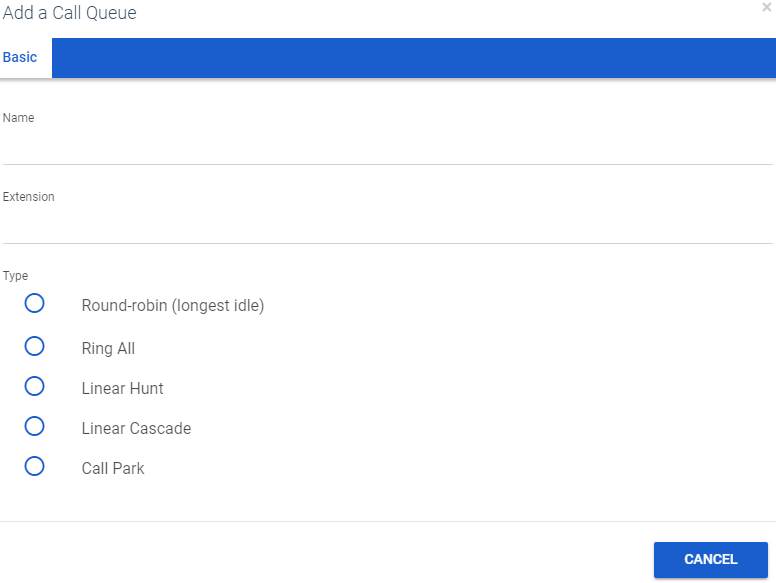
- Complete the fields (see Table 7-1).
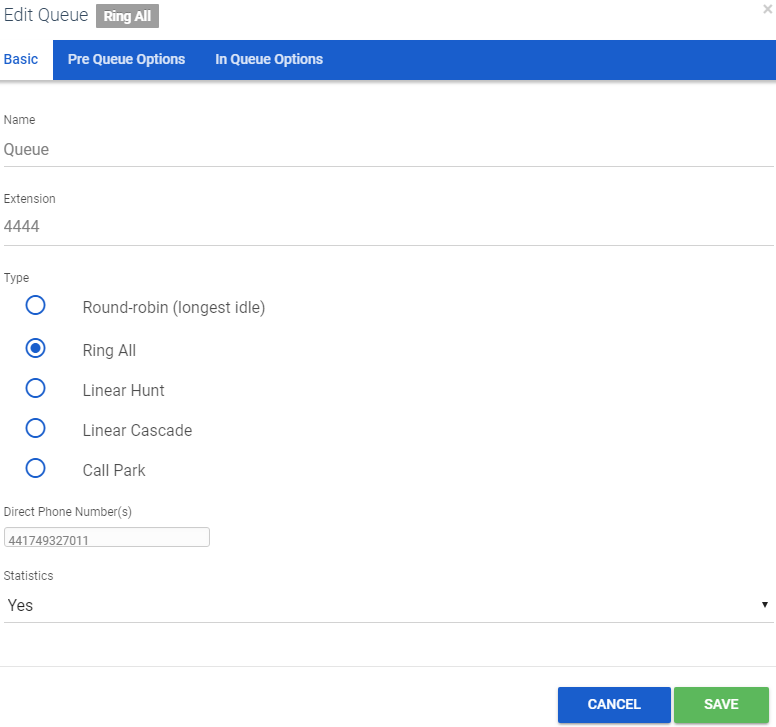
Table 7-1. Adding/Editing Basic Queue Settings
| Setting | Description |
| Name | Enter a name for this queue. The name should allow you to differentiate this queue from other queues you configured. |
| Extension |
Adding a queue: Select an extension. Editing a queue: read-only field that shows the extension. |
| Type |
Determines how calls are distributed. Choices are:
|
| Phone Number | Select the phone number. |
| Statistics | Select whether statistics will be recorded (Yes) or not recorded (No) for this queue. |
3. For Type, if you clicked Park, click Save to complete this procedure. Otherwise, click Next to display the Pre Queue Options tab and proceed to the next step.

4. Complete the fields (see Table 7-2).
Table 7-2. Adding/Editing Pre-Queue Option Settings
| Setting | Description |
|---|---|
| Require agents | Select whether to require (Yes) or not require (No) agents for this queue. |
| Require Intro MOH | This setting forces playback of the complete intro MOH before dispatch. This is useful for compliance greetings such as 'Calls may be recorded,' and so on. Select whether to require (Yes) or not require (No) the complete playback of the Intro Music on Hold for this call queue. |
| Max Expected Wait | Use the slider to specify the maximum expected wait time, in seconds. If the estimated wait time exceeds this time, the call cannot queue. |
| Max Queue Length | Use the slider to specify the maximum number of people that the system will allow to wait in this queue. |
| Allow Callback option | This setting allows callers to record their number, hang up, keep their spot in line, then get called when an agent is available. Select whether the callback option is available (Yes) or not available (No) to users in this queue. |
| Forward if unavailable | This setting specifies where to forward if prequeue options will not allow queueing (for example, expected wait is too high). Enter where the call forwards if queueing is not available. |
5. Click Next. The In Queue Options tab appears.
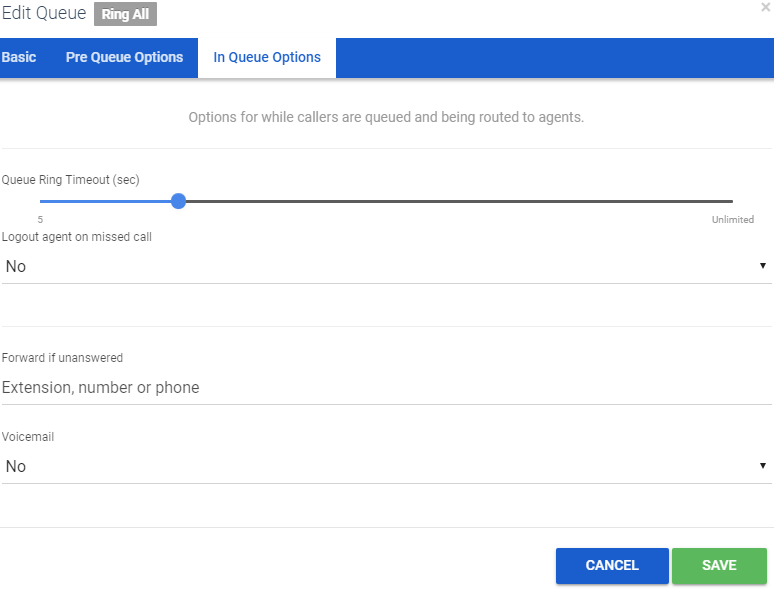
6. Complete the fields (see Table 7-3).
Table 7-3. Adding/Editing In-Queue Option Settings
| Setting | Description |
|---|---|
| Queue Ring Timeout | Use the slider to specify the maximum number of seconds that the call remains in the queue before timing-out. If Forward if Unanswered is enabled, the call is handled according to the Forward if Unanswered setting. If Voicemail is enabled and Forward if Unanswered is disabled, the system prompts the caller to stay in the queue or go to voicemail. |
| Agent Ring Timeout | Use the slider to specify the maximum number of seconds that the queue will ring an agent before moving on to the next agent. This value should be less than the Queue Ring Timeout value. |
| Logout agent on missed call | Select whether an agent logs callers out of the queue (Yes) or does not log out callers if an agent misses a call. |
| Forward if Unanswered | Enter the extension, phone, or number where callers are forwarded if agents fail to answer before the Queue Ring Timeout occurs. |
| Voicemail | Select whether callers will be (Yes) or will not be (No) given the option to leave a voicemail if agents fail to answer when the Queue Ring Timeout occurs and Forward if Unanswered is not set. |
7. Click Add.
Editing Queues
There might be times when you need to edit Queues. For example, you might want to change basic, pre-queue, or in-queue options.
- From the Queues page, either
- Click a name OR
- Hover over a name and then click the

.png) icon at the far right of the Queues page. For example:
icon at the far right of the Queues page. For example:.png)
Either step displays the Edit pop-up window. For example:
2. Perform the procedure starting with step 2 under 'Adding Queues'.
Deleting Queues
If you no longer need a queue, you can delete it from the system.
- From the Queues page, hover over the queue and then click the
.png)
 icon at the far right of the row. A confirmation prompt appears.
 - Click Yes to delete the queue or No to retain it.
Adding Music on Hold to a Queue
The Queues page allows you to add Music on Hold for queues.
- From the Queues page, hover over the queue and then click the
.png)
 icon at the far right of the row. The Music on Hold page appears.
 - Proceed to "Adding Music On Hold Files".
Working with Agents
The Queues page allows you to add, edit, and delete agents for queues.
- From the Queues page, hover over the queue and then click the

 icon at the far right of the row.
An Edit Agents pop-up window similar to the following appears.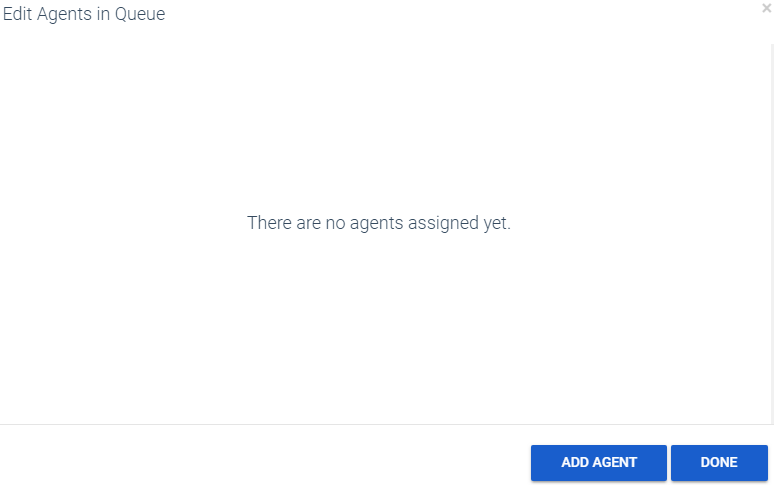
- To add an agent:
- Click the Add Agent button. The following settings appear.
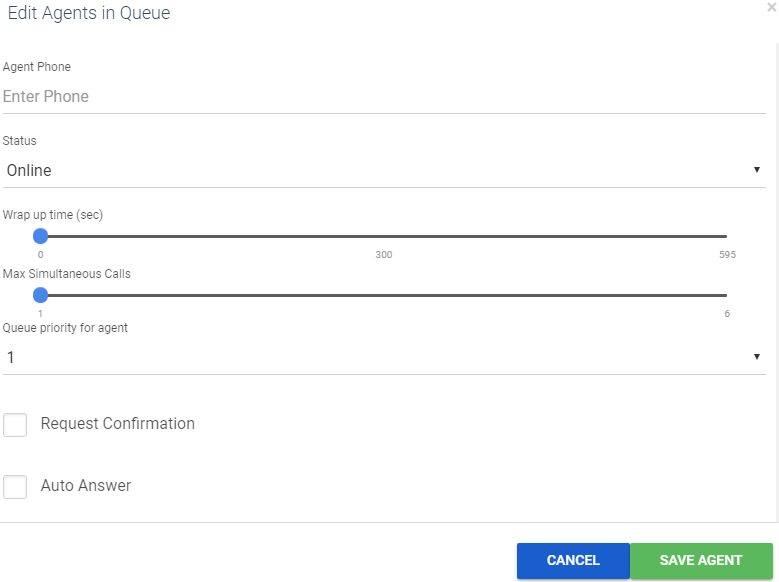
- Complete the fields (see Table 7-4).
- Click Save. The colour-coded status of the new agent is displayed.
- Green = available
- Grey = offline
- Red = on a call
- Click the Add Agent button. The following settings appear.
Table 7-4. Adding/Editing Agent Settings
| Setting | Description |
|---|---|
| Agent Phone | Select a phone of an agent to add to the queue. |
| Status | Select whether the agent is ready to take calls (Online) or not active (Offline). |
| Wrap up time | Use the slider to specify the amount of time the agent is allocated to complete paperwork after finishing a call and before a new call is dispatched. |
| Max Simultaneous calls | Use the slider to specify the amount of calls an agent can take at one time. This will almost always be 1. |
| Order in Linear Hunt | Sets the dispatch order. If a call is dispatching, it will go to the available agent with the lowest order. |
| Queue priority for agent | Sets weighting for an agent that is servicing multiple queues. If you have an agent servicing two queues and both queues have a person waiting, for example, the agent will get the call from the queue whose priority is highest (lowest number). |
| Request Confirmation |
Enables or disables request confirmation. Choices are:
|
| Auto Answer |
Enables or disables auto answer. Choices are:
|
d. Click Done.
3. To edit agent settings,
- Hover over an agent and then click the
.png) icon at the far right of the window. Settings similar to the following appear.
icon at the far right of the window. Settings similar to the following appear.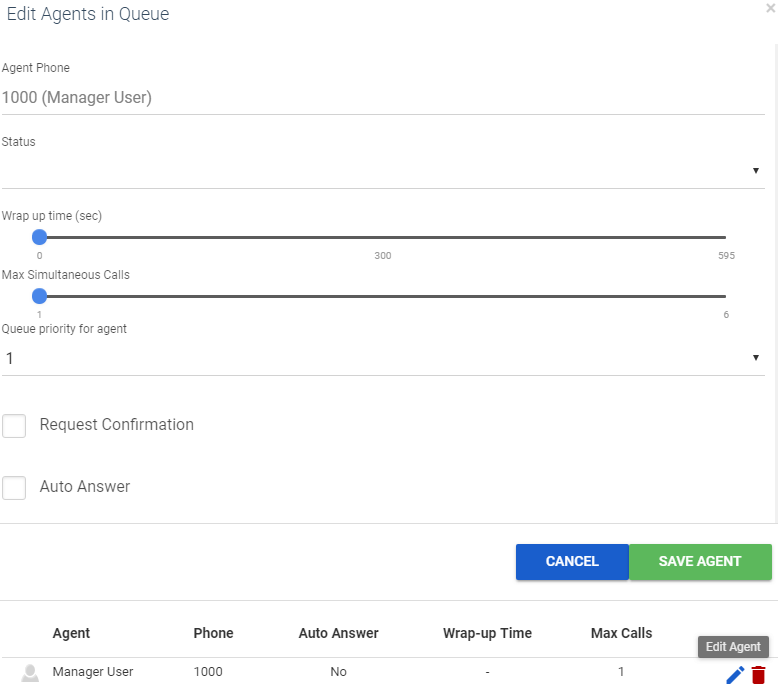
- Complete the fields (see Table 7-4).
- Click Save. The colour-coded status of the new agent is displayed:
- Green = available
- Grey = offline
- Red = on a call
- To delete an agent:
- Hover over an agent and then click the
 icon at the far right of the window.
 - When a confirmation prompt appears, click Yes to delete the agent or No to retain it.
- Hover over an agent and then click the
- When you finish working within the pop-up window, click Done.
Working with Queue Voicemail Feature
If you have chosen to set Voicemail to Yes within In Queue Options callers will be given the option to press a key to leave a voicemail if the Queue Ring Timeout is reached.
If the caller chooses to press this option the caller will be sent to the Queue's Voicemail box. To modify the configuration of this mailbox you will need to take the following steps;
- Navigate to the Extensions section
- Un-tick the Hide System Users at the bottom of the page.
- This will allow you to see System Users such as IVR's and Queues within the Extensions section.
- Select the Queue you have created by clicking on its name.
- At the bottom of the next page you will be able to set the PIN for this Queue's Voicemail by entering your chosen PIN in the New PIN and Confirm New PIN fields. Complete this change by pressing Save.
Additional Voicemail box options can be configured by selecting the Voicemail tab on this page.
To access the queue's mailbox
- Dial 5000.
- When prompted, enter the queue's number.
- Enter the voicemail PIN of the queue's mailbox, followed by #.

